Showing posts with label Windows Tricks. Show all posts

Friday, July 24, 2009

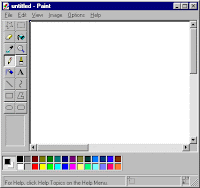
View Movie In Paint!


* Start the video in any player.[ I used VLC ]

* Open Paint.

* Now, in the player toggle the video to Full screen and press "Print screen" button on your keyboard.

* Now, Press ctrl+v [to paste] in Paint.

* Leave the player open.

* Open Paint now and see the movie !

Wednesday, July 15, 2009

Disabling Error Reporting

Sorry for infrequent posts, but my exams are nearing and I can't help it.

Nevertheless, here is a simple trick which my friend told me about:

The error report sending message is quite annoying as it continuously pops up.

Here is a simple way to get it out of way:

1. Go to Start -> Control panel.

2. Go to system.

3. Go to the Advanced tab.

4. Under the Advanced tab, at the bottom click on ‘Error reporting’.

Now click on ‘Disable error reporting’.

Thats all for today.

Sunday, June 21, 2009

Miscellaneous Tricks

Scroll Wheel Mouse Trick:-

If you have a mouse with a scroll wheel, hold down the Ctrl key and at the same time, by scrolling up or down with the little scroll wheel, you can alter the size of the text of the website.


Change Explorer Web View Background:-

If you use Web View for your Internet Explorer, you can change the background that appears.
Edit or recreate the image >file:///C:/Windows/Web/Wallpaper/XXXX.bmp
Make sure you keep the file dimensions the same,i.e.,800x600 pixels.

Monday, June 8, 2009

Net-Surfing Via Calculator


Ever accessed the web via a calculator???


_______________________________

Here are the steps to do so:
_______________________________


# Open your Calculator[Start ---> All Programs ---> Accessories ---> Calculator].


# Press F1 to open the help-window or select Help Topics, from Help menu.


# Single-Click on the top-left corner icon [a document with a yellow question mark] of the help window.


# Select Jump to URL and type your required url into the Jump to URL dialog-box.


IMPORTANT
__________

=============================================================================
[ Do type http:// before the url and not just www. (or equivalent).
[
[ e.g.
[
[ http://www.vrtex.blogspot.com
[
[ AND NOT
[
[ www.vrtex.blogspot.com

IN SOME COMPUTERS [ like mine ], BOTH MAY WORK EQUALLY WELL
=============================================================================

Saturday, June 6, 2009

Keyboard Disco

Instructions:
*paste any of the codes in notepad
*Save as AnyFileName.vbs
*Run the file
*to stop, launch task manager and then under "Processes", end wscript.exe


1.This piece of code makes your keyboard a live disco...

Set wshShell =wscript.CreateObject("WScript.Shell")
do
wscript.sleep 100
wshshell.sendkeys "{CAPSLOCK}"
wshshell.sendkeys "{NUMLOCK}"
wshshell.sendkeys "{SCROLLLOCK}"
loop


2.This one makes it looks like a chain of light....

Set wshShell =wscript.CreateObject("WScript.Shell")
do
wscript.sleep 200
wshshell.sendkeys "{CAPSLOCK}"
wscript.sleep 100
wshshell.sendkeys "{NUMLOCK}"
wscript.sleep 50
wshshell.sendkeys "{SCROLLLOCK}"
loop

Saturday, May 30, 2009

Deactivate the balloon tips


# Go to Start ==> Run


[ Alternatively, you may press Windows key+R ].


# Type regedit in the run dialog-box & click on OK. [ This will open the registry editor].


# Follow one of the paths listed in this box-
==================================================================================
- If you wish to disable the messages for all users of the computer: double click on HKEY_LOCAL_MACHINE

- If you want to disable messages only for yourself/the current user, double click on HKEY_CURRENT_USER
==================================================================================


# Go to SOFTWARE ---> Microsoft ---> Windows ---> CurrentVersion ---> Explorer


# Click on Advanced


# Right-click on an empty space in the right-part of the window opened and select


New ---> DWORD Value


# Type : EnableBalloonTips,set its value to 0 and press Enter to confirm


==========================================================================

Note: Do type as given [upper and lower case must be exactly like the given] else it won’t work.

==========================================================================


# Restart your computer to see the effect!


Caution- Don’t play with the registry else you will harm your computer. This post won’t create any problems until and unless you yourself commit some mistake. None except you are liable for your mistakes and the harms done.


Monday, May 4, 2009

ASCII Codes

Here are some common ASCII codes.Use these to form new tricks:
(Alt+)
space = 0160 or 016032
♂ = 11
ï = 321
Ö = 153
Ä = 654 or 016068
ô = 778899
ƒ = 159
± = 753 or 016049
§ = 789 or 016039
• = 7 or 016021
¬ = 426
Ç = 426624 or 016071
º = 2471 or 016058
ç = 543345543345543
] = 605
µ = 230 or 016053
∙ = 505
~ = 445566
∞ = 4455660
È = 0456
î = 77708
¥ = 157 or 016037
≈ = 759
Ñ = 165
) = 1065
Ü = 10650
ê = 778899665544
≥ = 754
° = 5880 or 016048
ÿ = 920
l = 7894455660
‹ = 016011
Œ = 016012
Ž = 016014
‘ = 016017
’ = 016018
“ = 016019
” = 016020
– = 016022
— = 016023
˜ = 016024
™ = 016025
š = 016026
› = 016027
œ = 016028
ž = 016030
… = 0133
Ÿ = 016031
¡ = 016033
¢ = 016034
£ = 016035
¤ = 016036 or 0160932
¦ = 016038
¨ = 016040
© = 016041
ª = 016042
« = 016043
new line = 010
¬ = 016044
® = 016046
¯ = 016047
/ = 47
³ = 016051
´ = 016052
¶ = 016054
· = 016055
¸ = 016056
¹ = 016057
¼ = 016060
½ = 016061
¾ = 016062
¿ = 016063
À = 016064
Á = 016065
 = 016066
à = 016067
Å = 016069
Æ = 016070
È = 016072
É = 016073
Ê = 016074
Ë = 016075
Ì = 016076
Í = 016077
Î = 016078
Ï = 016079
Ð = 016080
Ñ = 016081
Ò = 016082
Ó = 016083
Ô = 016084
Õ = 016085
Ö = 016086
× = 016087
Ø = 016088
Ù = 016089
Ú = 016090
Û = 016091
Ü = 016092
Ý = 016093
Þ = 016094
ß = 016095
à = 016096
á = 016097
â = 016098
ã = 016099
ä = 016100
å = 016101
$ = 036 or 36
è = 650
÷ = 758
æ = 145
¬ = 1450
ñ = 14500
¢ = 155
› = 0155
‘ = 0145
ª = 166
= 1660
ú = 163
τ = 999
ç = 0999

Sunday, May 3, 2009

Hiding Files In A Pic


Requirement: WinRAR

1. Collect all the files which you wish to hide.


2. Place them in any folder. [I chose E:\NF].


3. Make a RAR archive [ I made qwerty.rar ] in the same folder [ here E:\NF] and add all the files that you want to hide in this archive.


4. Take a JPEG picture file [ I have taken rose.jpg ].


5. Paste this JPEG picture file in your folder/directory [ e.g.- I posted rose.jpg in E:\NF ].


6. Go to Start > Run and type cmd to open Command Prompt

[ Alternatively, you can open the Command Prompt from the Start Menu ].


7. Make your directory as your working directory.e.g. – My Command Prompt displayed 

H:\Documents and Settings\HHH>

The steps are-
• H:\Documents and Settings\HHH> E:
• E:\>cd NF
• E:\NF>


8. Type :

COPY /B rose.jpg + qwerty.rar hide.jpg


NOTE- rose.jpg is the picture you selected

qwerty.rar is the archive in which you have hidden your files

hide.jpg is the new file that contains both the above-mentioned files

/B is a switch indicating a binary file


9. Open your folder [ like I will open NF in drive E: ].


10. You will get a file hide.jpg [ or of any other name, if you had selected a different name].


11. Double clicking it will display the photograph.


12. To see the hidden files simply open it with WinRAR.


THIS TRICK WORKS IN XP BUT I AM NOT SURE ABOUT VISTA.
IF IT DOES, PLEASE LET ME KNOW ABOUT IT.

Thursday, April 30, 2009

Invisible Folder

· Choose the folder want to make invisible.


· Rename it with a space by pressing Alt+0160 or Alt+255

[ use the Numpad and not the keys on the top of the keyboard ]


· Right-click on the selected folder, and select “Properties”.


· Go to Customize > Change Icon.· A dialog-box will come up showing a variety of icons.


· In the dialog-box displayed,you'll find empty spaces between icons.Select one and press OK.


· Press OK in the Properties dialog-box.


· Your folder would have become invisible! However, you can still use it as a normal folder.

Wednesday, April 29, 2009

Writing In Zip File

Here is a new trick, discovered by me today itself. Well it is a very simple trick to keep away your little bros and sis from your personal documents.

Steps:


• Create a simple .zip file.[Do not use any software like WinZip, I am not sure whether it works with the professional softwares but I will soon let you know].


• Right-click on the zip file and open it with Wordpad.


• Type the text that you want to hide.• Save the file and close Wordpad.


• Open the Command prompt [ Start > Run & type “cmd” { without quotes } ].


• Write this command:ATTRIB +S [path] [filename]

{ REPLACE THE “path” WITH THE PATH OF YOUR ZIP FILE AND THE “filename” WITH THE NAME OF YOUR ZIP FILE }.

This will make the zip file a system file and if you will delete it, it will show a warning!


• Now, to read/edit your file simply open the zip file with Wordpad.


• Keep this zip file safe so that you do not delete it accidentally.


Note- Do not put anything in the zip file else, all that you have written will be lost. In order to prevent this, simply delete the first line when you open the zip file, for the first time, in Wordpad. This will make the zip file corrupted and will prevent automatic addition of any content.
Creative Commons License
Vrtex by Vibhu is licensed under a Creative Commons Attribution-Non-Commercial-Share Alike 2.5 India License.